Datum points are most commonly used for creating other datum entities, such as an axis, plane or curve. Datum points can also be used as sketcher references or for assembling two components into an assembly. We will cover different method to create datum point.
First make a rectangle with width, length, depth of your choice. Now click at datum point icon![]() it will open a new small window. There you can create as many datum points as you want or you need. This step will remain common.
it will open a new small window. There you can create as many datum points as you want or you need. This step will remain common.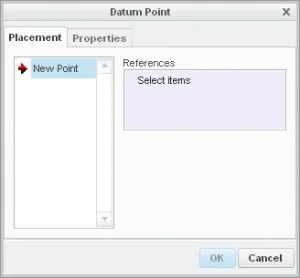
On surface
This is a datum point that lies on a selected surface, and its location is measured from two references. To create this, click at any surface of solid part. The Creo will respond you as shown in fig.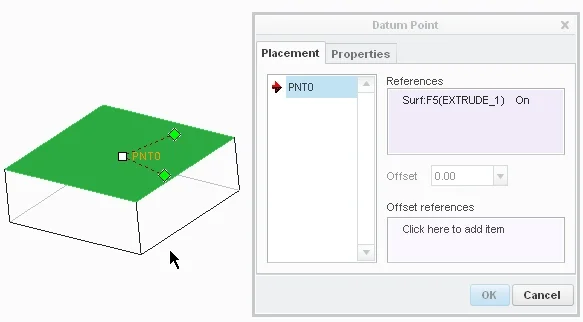
White dot will be referring to the point location while other two green dots will be used to make our point referenced. To do this just click at any green dot hold it and move it towards your reference. when a reference is selected the green dot will turn in to black. Do the same with other green dot but remember that your references should not be parallel. i selected the two surfaces that can be seen as green in following fig. Adjust the distance from reference and press ok to draw the point.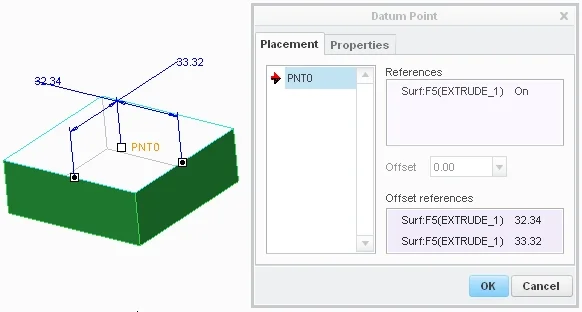
Offset Surface
To create this datum point you need to follow the fig shown above . in right side of picture, within the reference section of datum box and in front of selected surface you will see the word “on” click at this it will turn in to a drop list, from there select the offset, then give it a value and press ok.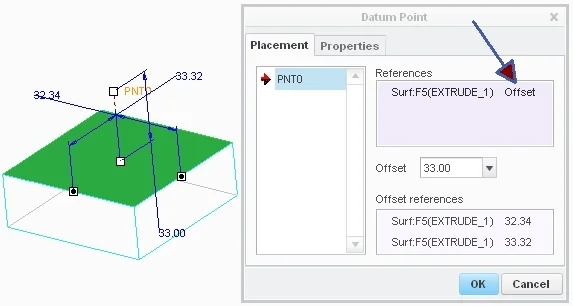
On curve
If you want to draw a datum point on a curve, then you will use this method to create it. To do so click at the curve or the edge ( as in this case), creo will analyze the end points and it will make those ends points constraints to our datum point. You can make any Endpoint a reference of datum point.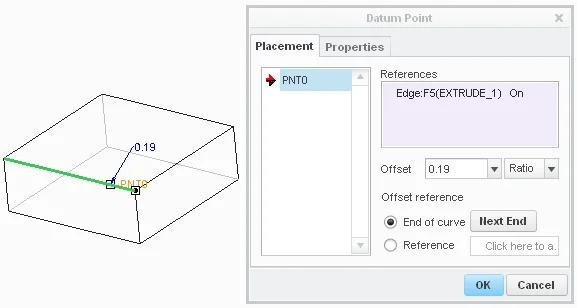
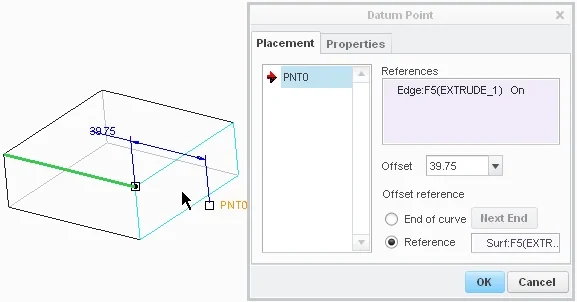
If you want to extend datum point to outside the constraints then you have to select the “Reference” option in datum point box.The creo will ask you to select the reference for this just select any plane that is perpendicular to our selected curve or line.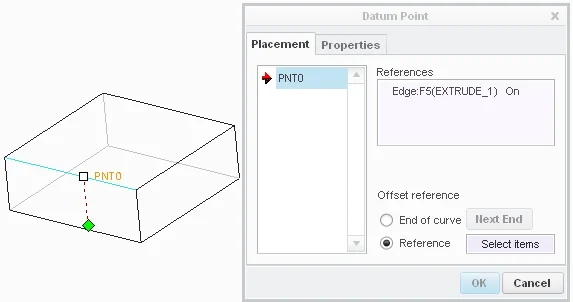 Now you need to put some value in offset box and press ok.
On Vertex
This is as simple as to make a single click. All you have to select any corner point There a vertex point will automatically be generated.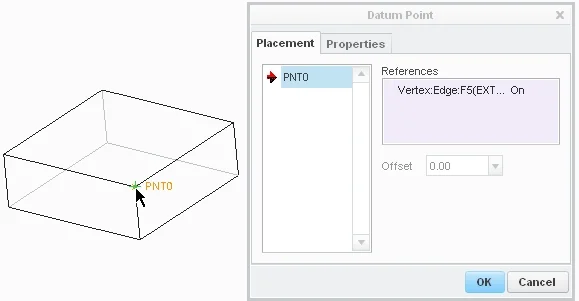
Offset Vertex
We will follow the last fig under On vertex heading Or you can create another vertex point for it. Now if you want to move the point along any direction parallel to the any line that make the corner or vertex, then press ctrl key and hold it and then click at any side that you want. This will make a new entry in datum point box and also give you opportunity to move point along the selected edge.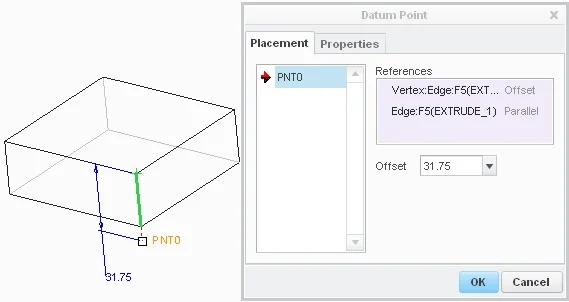
At center
To use this method you need to select the curve and then in datum point box , under the reference section and in front of select curve you will see the option On. Just click at this and in drop list select the option Center. The program will generate a point at the center point of the curve.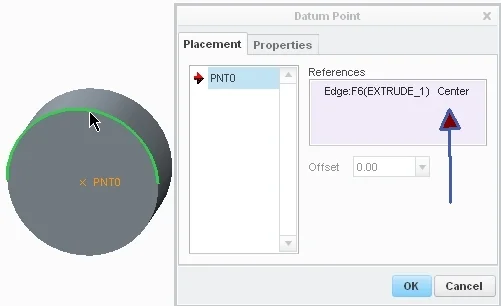
In sketch
You can generate datum points during sketching. This method I already have explained in my pattern tutorial you can read it by clicking HERE
Share it
Leave a Reply