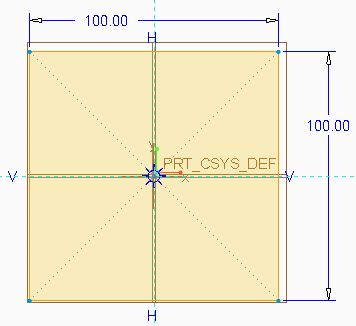
Offset tool in Creo Parametric sketch is used when you have to manipulate part / whole geometry.
For demonstration purpose, First step is to make a square or rectangle which is prerequisite of this tutorial. length and width are taken as 100 units.
Steps for creating offset
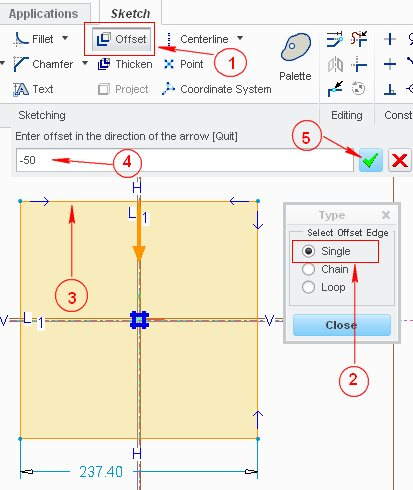
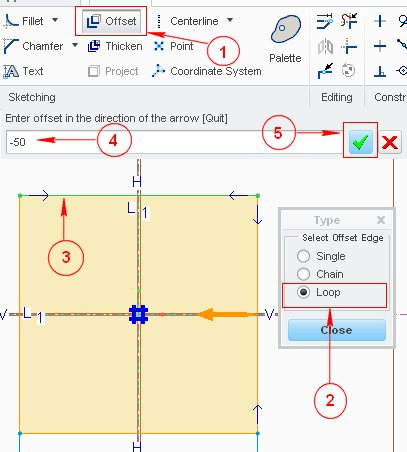
- select the offset tool from ribbon, a small dialog box will open in which three options can be seen.
- Select the offset type Which are:
Single- used to create an offset of single entity and it is selected by default.
Chain- this option can be used to create an offset of more than one entity.
Loop- this option will create the offset of whole geometry. - Now select an entity of your choice, in this tutorial its a line. A box will appear at the top of sketching area.
- Enter the value of required offset, you can use -ve values to change the offset direction.
- click on green right button to generate the offset.
single
The use of this tool is pretty simple after selecting the tool option you need to select the line and have to input the desired offset value. Creo parametric will generate the line / entity. To change the direction of offset,place the -ve sign with the offset value (can be seen in following figure).
Chain
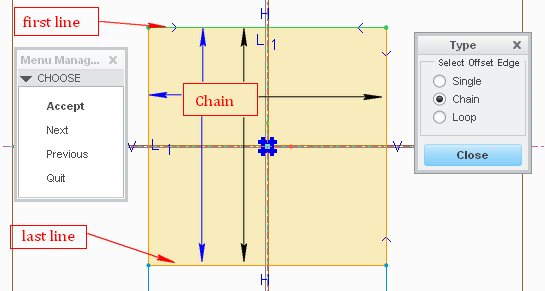
This becomes useful whenever you want to offset more than one entity. In this option you need to select the first or starting entity and then select the last entity. After selecting first and last line creo parametric will ask you about the chain entities. A small dialog box will appear in which you have to select the chain pattern/ direction and after confirming the pattern you have to “Accept”. Now you have to provide offset value to gain your desired results.
By default Creo Parametric will move in clockwise direction while selecting the entities in this option (pointed using black colored arrows in the following figure). If you click on “next” in “choose” menu, then creo parametric will try to find next combination of entities from first line to last entity that you have selected. In this case, which I am explaining in this post, the next combination will be in anti-clockwise direction. The entities with this combination are pointed using blue arrows.
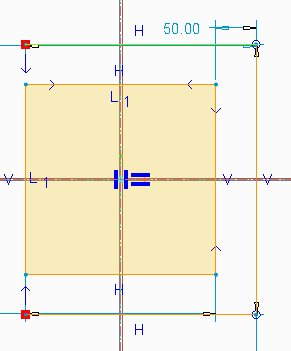
I accepted the default pattern and inserted an offset value to -50 units. The final result of this setting is shown in the flowing figure.
Loop
If you want to offset the whole closed sketch, then this is best option for you. All you need to select any line/ entity of the closed sketch and Creo Parametric will generate the offset according to your offset value. the setting or click pattern is shown in the following figure with numbered.
Share it
Leave a Reply